
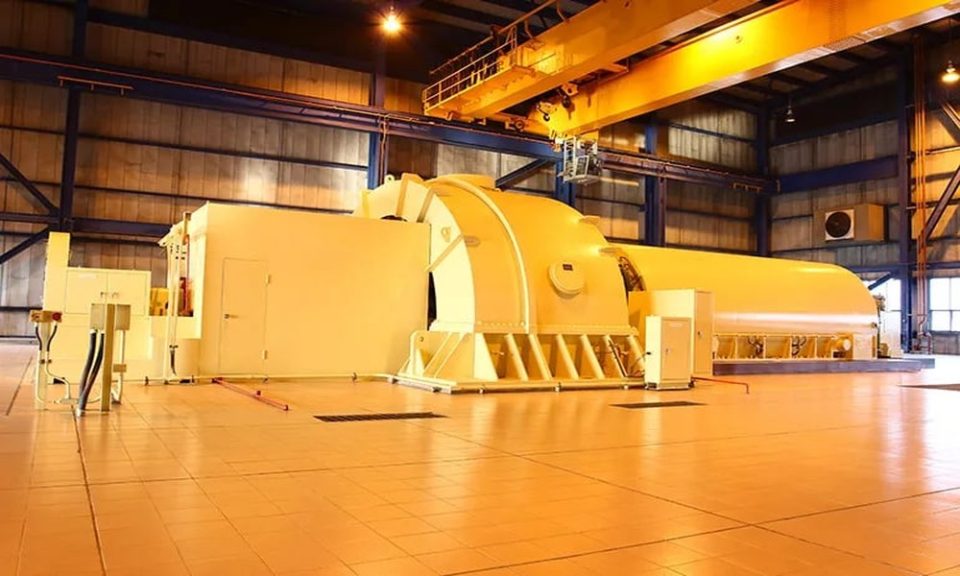
A vital source of energy for electricity generation, steam turbines are essential to many different sectors. To guarantee optimum performance, these need to have regular maintenance performed as well as sporadic repairs.
Preventing inefficient operations, unforeseen disruptions, and expensive repairs is crucial. Regular inspections and servicing are essential.
Over time, elements including erosion, thermal stress, and component wear may affect turbine performance. It is essential to use trustworthy turbine repair services in these kinds of circumstances.
External Inspection
- Examine the bearings of the turbine.
Inspect the casing closely, paying particular attention to any obvious cracks, leaks, or distortions. To find internal cracks that might not be apparent from the outside, use radiography techniques or ultrasonic testing.
- Assessing Insulation Materials
Observe insulation for indications of deterioration, such as rips, moisture intrusion, or separation from the casing. To ensure safety and thermal efficiency, replace any broken insulation.
- Evaluate the alignment of the flange and the bolt tension.
- Check bolt tightness using a regulated torque wrench in accordance with OEM guidelines.
- Inspect for misalignment in the flange joints, as this may result in unequal stress distribution and steam leaks.
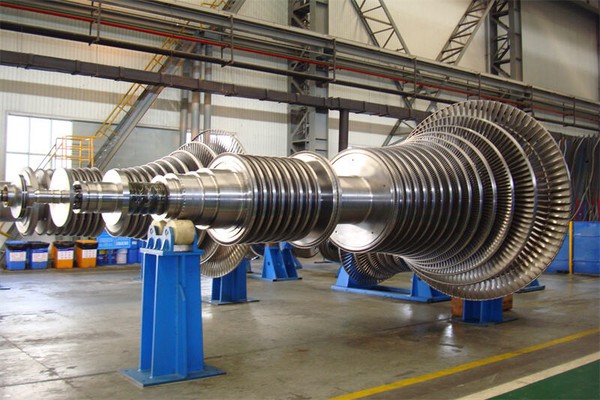
Inspection of Rotors
- Runout Measurement
- Measure the axial and radial runout of the rotor using laser alignment equipment or a dial indicator.
- Find out if there is misalignment or deformation, and compare measures against OEM standards.
- Keep track of baseline values for comparison in the future.
- For erosion, pitting, or thermal distortion:
- Examine the rotor visually for signs of warping or discoloration, as these could be signs of heat distortion.
- Check for wear or cavitation-related pitting on the shaft surface.
- Inspect regions with high steam pressure or inadequate flow control for indications of erosion.
- Perform NDT (non-destructive testing):
- Use ultrasonic testing to find rotor defects or subsurface cracks.
- To find surface-level cracks, particularly in the vicinity of high-stress areas, use dye penetrant testing.
- For improved crack identification in big or crucial turbines, take into account magnetic particle testing (MPT). Click https://www.txndt.com/blog/ndt-training-houston-texas-the-best-academy-to-get-trained-in-magnetic-particle-testing/amp for your awareness.
Blade Examination
- Examine for deposits, corrosion, or cracking.
- Inspect blades for rust, chemical deposits, or scaling, using visual aids such as borescopes.
- Keep an eye out for symptoms of stress corrosion cracking (SCC), especially in hot or humid conditions.
- To restore blade efficiency, remove any deposits using the cleaning solutions suggested by the OEM.
- Look At the Attachments
Verify that the blade roots are firmly fastened to the shroud or rotor disk. Examine attachment points for looseness or fretting, as these can cause failure or vibrations. Verify that bolts or other fasteners are torqued to the manufacturer’s recommended levels.
- Decide which edges are leading and trailing
Examine the front end for degradation brought on by collision from particles or high-velocity steam. Aerodynamic performance may be impacted by cracks or erosion of material on the trailing edge. Verify that there are no indications of foreign object damage (FOD), like gouges or nicks.
Bearing Maintenance
- Check alignment and measure bearing clearances.
- Use precise measuring instruments like bore gauges or micrometers.
- Compare the calculated clearances with OEM tolerances.
- Use dial indicators or laser alignment equipment to check the bearing and rotor alignment.
- Replace any damaged or worn-out bearings.
To prevent harming the shaft or housing, remove bearings using specialist extraction tools. Look for surface wear, staining, or scoring on the removed bearings.
These could be signs of alignment or lubrication problems. Install replacement bearings in accordance with OEM guidelines, making sure they are contaminant-free and clean.
- Check for Proper Lubrication Pressure and Flow.
Examine the lubricant flow routes for leaks or obstacles. To ensure that the mechanism for lubrication is functioning within the advised pressure range, use pressure gauges.
Make sure the oil temperature stays within the range advised by the OEM. It’s because excessive heat can deteriorate the lubricating qualities.
Nozzles and Diaphragms
- Check for erosion, scaling, or fouling in the nozzle vanes.
To see inside the nozzles, remove the access panels or casing. Examine the nozzle vanes visually for any scaling brought on by mineral accumulation or deposits.
Look for erosion, especially at the front edges. Since this could be a symptom of low steam quality or high-velocity steam hits. To examine regions that are difficult to reach, use a borescope.
- Check for misalignment or cracks in the diaphragms and make any necessary repairs.
To find diaphragm cracks, use non-destructive testing (NDT) techniques such as dye penetrant or ultrasonic testing. Verify that the diaphragm segments are aligned to OEM tolerances.
Use the OEM-recommended brazing or welding techniques to fix small cracks. While maintaining the structural stability of the restored areas. To avoid malfunctions or performance problems, replace diaphragms that are seriously damaged.
You may check this out to learn more about replacements.
Indications That Your Turbine Needs Maintenance
- Reduced Efficiency: Unexpected declines in energy output or performance may be a sign that repairs are necessary.
- Vibrations or Odd Noises: Any odd noises or vibrations could be a sign of a mechanical problem that has to be fixed right away.
- Leaks and Fluid Loss: These issues should be fixed right away. That’s because they might cause operational inefficiencies in the steam turbine system.
- Higher Energy Consumption: This could be an indication of internal damage that has to be fixed.